A toolkit for creating powerful cloud-based 3D experiences that stream to traditionally out of reach low-powered devices.

Quick Links
- Getting Started
- How to build the toolkit
- Building WebRTC from source
- Large scale cloud deployment
- Client samples
- Server samples
- Tutorials
- Next Steps
- Learn More
What is this?
Problem: The world is becoming increasingly mobile, but the demand for high-fidelity 3D content is only growing. We needed a scalable approach to make this sort of content available on low-powered, low-bandwidth devices.
The 3DStreamingToolkit project’s purpose is to provide an approach for developing 3D server applications that stream frames in real-time to other devices over the network. Specifically:
- A server-side C++ plugin and samples for remotely rendering and streaming 3D scenes
- Cross-platform client-side samples for receiving streamed 3D scenes, including HoloLens
- Cloud infrastructure architecture to allow large-scale deployment
- Zero latency video compression using NvPipe/NVEncode
- WebRTC extensions for 3D content and input

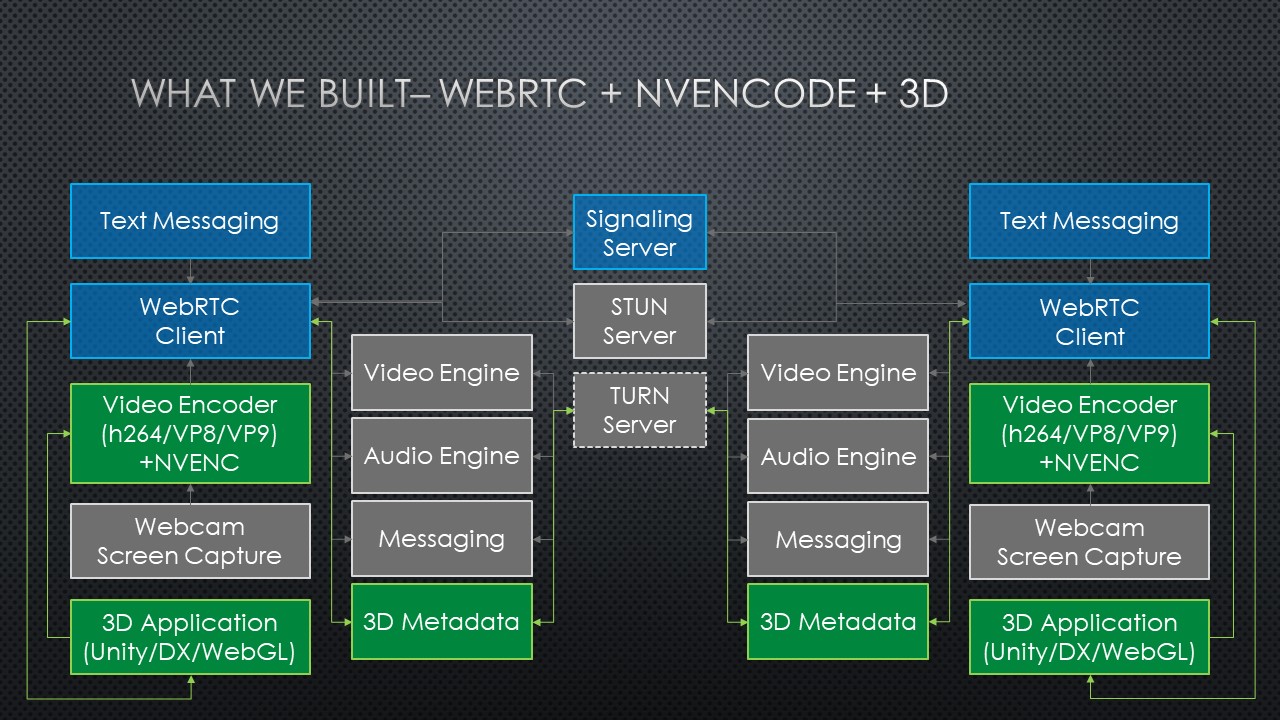
Here’s a high-level diagram of the components we’ve built (in green), and how they interact with the underlying WebRTC and NVEncode technologies we’ve leveraged.
Getting Started
This toolkit is available as a native C++ plugin and can be added to any rendering engine to enable streaming over the network using WebRTC. Our client samples are the perfect starting point to test the streaming capability and interacting with the 3D scene.
Every client and server application using this toolkit will need to connect to a signaling server and a TURN server. Before continuing, it is important that you familiarize with WebRTC and understand what servers are required for your solution. Please see this in-depth tutorial about signaling and STUN/TURN.
1. Signaling server
Our streaming solution is compatible with any standard WebRTC signalling implementation, however, in order to take advantage of multiple peers on one server and scaling features, we recommend our signaling server implementation. The Deploy to Azure button will automatically spin up a server on your subscription.
V1.3.0 onwards has full CORS support for running locally or in the cloud with http or https. Look at the README and documentation on that page to see which extensions are available and supported.
2. TURN server
As explained above, for most scenarios, servers and clients will be behind multiple layers of NAT, proxies and corporate firewalls. To enable streaming, it will be required to have a TURN server deployed and running.
Please see our code story on how to deploy a simple or load-balanced TURN.
3. Sample server and client applications
We strongly recommend running out pre-built samples for server and clients, before attempting to integrate the plugin into a new application. This will ensure the network configuration is running properly.
Any local or remote server machine that will be used for rendering and streaming, must have the following prerequisites:
- The target machine must run Windows 10 or Windows Server 2016 and must have a compatible Nvidia GPU that can run Nvencode.
- x64 Visual C++ Redistributable for Visual Studio 2015
NOTE: you can use a non-Nvidia GPU for testing as it will automatically switch to software encoding, however, we do not recommend using that in production as the latency and FPS will be greatly affected.
You can download and unzip any of the server/clients from our latest release. Our easiest pair to start with is DirectX-NativeClient-v2.0 and DirectX-SpinningCubeServer-v2.0.
4. WebRTC Configuration (webrtcConfig.json)
3DSTK’s sample server applications make use of an external JSON configuration file (webrtcConfig.json) to manage the connections to the Signaling and TURN services. Below is an example webrtcConfig.json file. This file contains placeholders for server addresses from your server setup in step 1 and 2. This file is found in the executable directory.
{
  "iceConfiguration": "relay",
  "turnServer": {
    "uri": "turn:<url>:5349",
    "username": "<username>",
    "password": "<password>"
  },
  "server": "<url>",
  "port": 80
  "heartbeat": 5000
}
Our sample clients use the same configuration options but depending on the platform, it might be part of a json file or part of the source code. For example, our DirectX-NativeClient-v2.0 uses the same webrtcConfig.json as part of the executable directory and our WebClient-v2.0 has the config options as part of the app.js
 var defaultSignalingServerUrl = 'http://localhost:3001';
  var pcConfigStatic = {
    'iceServers': [{
        'urls': 'turn server goes here',
        'username': 'username goes here',
        'credential': 'password goes here',
        'credentialType': 'password'
    },
    {
      'urls': 'stun:stun.l.google.com:19302'
    }],
    'iceTransportPolicy': 'relay'
  };
5. Streaming your first scene
Before trying to connect the server and client, make sure you set the SAME signalling and TURN url for BOTH the client and the server webrtc configurations.
Simply open the client and server sample apps and press the connect button. You will now see the client/server appearing in the “List of currently connected peers”.
To start streaming, double click on the client/server name and the real-time interaction will begin. You can use the client app to click and drag to move the camera in the scene.
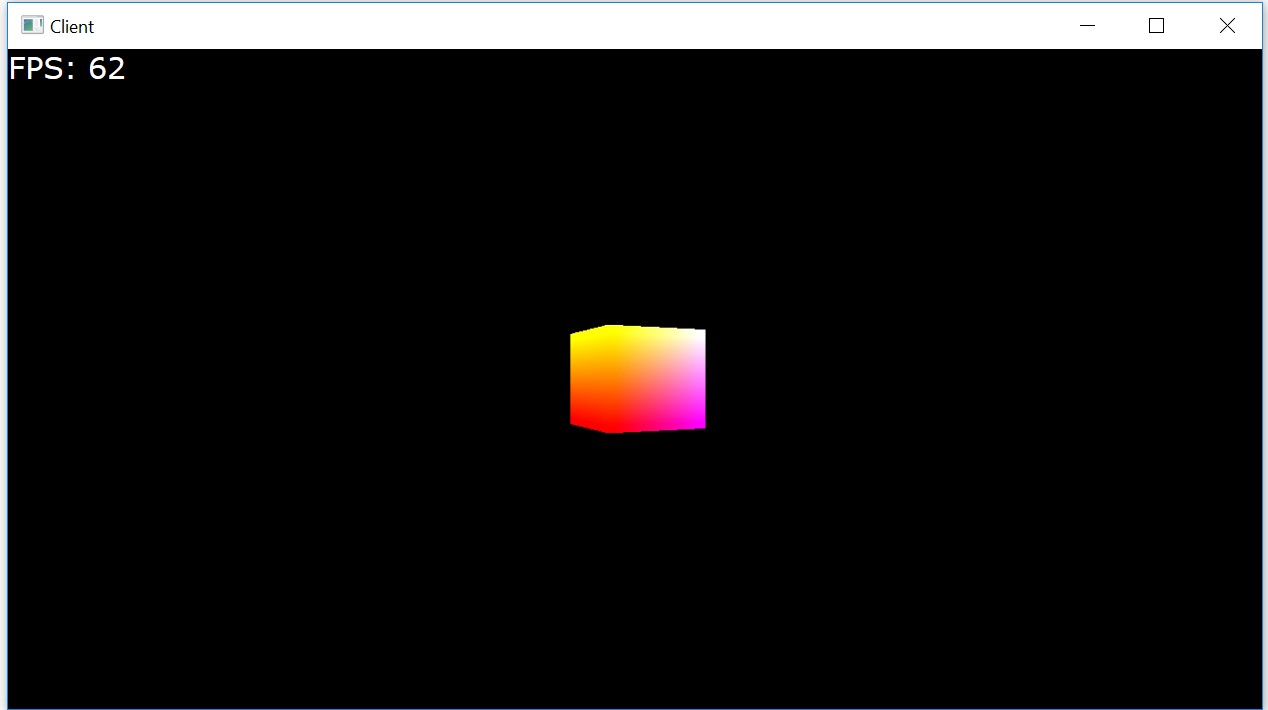
This is the output of the DirectXSpinningCube server when connected to a DirectX native client.
After connecting, you should be seeing success! If you’re instead seeing errors, check out the Troubleshooting guide and then file an issue. Additionally, you can see more information about our other sample implementations here.
How to build the toolkit
These steps will ensure your development environment is configured properly, and then they’ll walk you through the process of building our code.
Prerequisites
- Windows 10 Anniversary Update / Windows Server 2012 R2 / Windows Server 2016 (see which version of Windows you have)
- Visual Studio 2017
- Windows 10 SDK - 10.0.14393.795
- Latest NVIDIA driver (required for NVEncode)
- CUDA Toolkit 9.1 (required for NVEncode)
- Unity 2017.4.4f1 LTS release (Optional, but required for Unity server and client samples)
Installing dependencies
Note: Before running our
setup.cmdscript, please ensure powershell is set to enable unrestricted script execution. Thesetup.cmdscript will useAzCopyif installed, which will speed up the dependency downloads. Download the latest stableAzCopyfrom http://aka.ms/downloadazcopy.
Run .\setup.cmd from the command line. This will install and configure the following:
- 32bit and 64bit Debug, Release, Exes, Dlls and PDBs from this commit Chromium m62 release
- M62 WebRTC native and UWP extensions, which add nvencode support, frame prediction (for HoloLens), video frame updates and native buffers to webrtc. These will be applied to the above
- Pre-built NvPipe library used in our WebRTC extension to enable NVIDIA-accelerated zero latency video compression
- CUDA Toolkit 9.1 pre-built Release libraries used by NvPipe - cudart64_91 and nvToolsExt64_1
- 32bit and 64bit Debug and Release libraries for DirectX Toolkit
- Release libraries for OpenGL - Freeglut, Glew and glext
Once you see Libraries retrieved and up to date you may proceed.
The actual build
- Open the 3DStreamingToolkit solution in Visual Studio
- Build the solution (Build -> Build Solution) in the desired configuration (Build -> Configuration Manager -> Dropdowns at the top). We encourage using
Releaseandx64. - Done!
Note: We no longer support x86 server builds that are using nvencode. This is due to 32-bit support gradually being deprecated/removed from CUDA.
If you’re instead seeing errors, check out the Troubleshooting guide and then file an issue.
Building WebRTC from source
For any changes to the underlying native or UWP WebRTC library, you must build WebRTC from source. We pushed all our extensions and patches to a single GitHub repo. Follow these steps to build from source.
Large scale cloud deployment
In a real-world scenario, this solution will require a large-scale cloud infrastructure to support multiple active users and manual/dynamic scaling based on usage. To achieve this, we created a reference architecture that can be easily deployed on your Azure subscription. To get started, look at Large scale cloud deployment.
Client samples
- HoloLens DirectX client sample
- HoloLens Unity client sample
- Android Java client sample
- iOS Swift client sample
- Web client sample
- React Native client sample
Server samples
- DirectX spinning cube server sample
- DirectX multithreaded server sample
- OpenGL spinning cube server sample
- Unity fractal server sample
Tutorials
Next Steps
These resources will be critical to your success in configuring and scaling applications.
- The feature matrix
- Sample implementation configuration files
- Rendering service configuration
- Multiple users connecting to a single server
- Configuring authentication
