Large scale deployment tutorial
This tutorial provides instructions on how to set up a large-scale cloud architecture for use with the 3D Streaming Toolkit.
- Log in to Azure
- Create a new Virtual Network
- Deploy a Signaling Server
- Create a new Azure Batch account
- Upload streaming application releases to Azure Batch
- Upload all dependencies and functional tests to Azure Batch
- Clone/Download the sample Cloud3DSTKDeployment web app/api project
- Modify/add QA tasks for Linux/TURN pool creation
- Modify/add QA tasks for Windows/Rendering pool creation
- Run the Web project, locally or in the cloud
- Invoke the Cloud3DSTKDeployment endpoints with HTTP POST
- Setup auto scaling with api/orchestrator endpoint
- Browse the Batch account using the Portal or Batch Explorer
- Connect the clients to the VMs
Extra customization:
- Customizing your Compute Nodes
- Setting up Azure AD for Batch usage
- Network Configuration for Batch usage
1. Log in to Azure
Log in to the Azure Portal at: https://portal.azure.com

2. Create a new Virtual Network
- Click + “Create a resource”.
- Search for Virtual Network and click to proceed.
- Complete the fields for the network’s Name, Address Space, Subscription, Resource Group, Location, Subnet, Address Range, DDoS Protection Level, and any Service Endpoints.
- For more information, refer to the following guide: https://docs.microsoft.com/en-us/azure/virtual-network/quick-create-portal

3. Deploy a Signaling Server
- Refer to the Signaling Server from the following repo: https://github.com/3DStreamingToolkit/signal-3dstk
- Clone the repo locally if you wish to download the code.
- Click the “Deploy to Azure” button directly from the repo’s Readme page.
- Once deployed, add the following properties:
- WEBRTC_HEARTBEAT_ENABLED: TRUE
- WEBRTC_HEARTBEAT_MS: 5000
- WEBRTC_CAPACITY_ENABLED: TRUE
- WEBRTC_PEERID_RESPECT_CAPACITY: TRUE
- WEBRTC_PEERID_PAIRING: TRUE
- The settings above will ensure the signaling server will remove unresponsive clients/servers and assign new clients based on server capacity.

4. Create a new Azure Batch account
- Click + “Create a resource”.
- Search for Batch Service and click to proceed.
- Complete the fields for the Batch Account’s Name, Subscription, Resource Group (use existing), Location, Storage Account, Pool Allocation Mode (Batch Service or User Subscription).
- For more information, refer to the upper sections of the following guide: https://docs.microsoft.com/en-us/azure/batch/quick-create-portal
- NOTE: you won’t have to create any pools or nodes manually because we will do this programmatically using the Batch SDK.

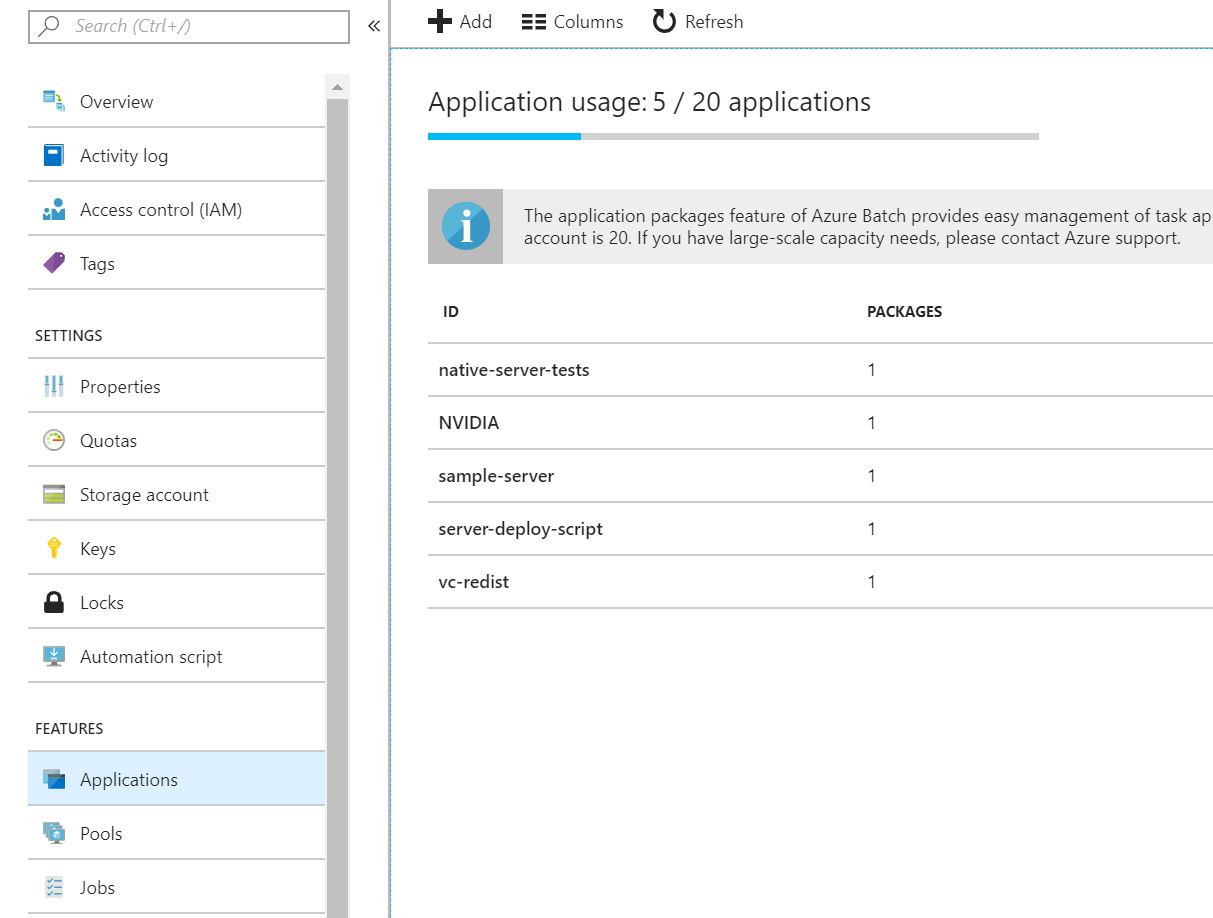
5. Upload streaming application releases to Azure Batch
- Visit the Azure Portal at: https://portal.azure.com
- Click on the Batch account you created earlier.
- Browse the sections to see Applications within that Batch account.
- Upload the application releases with desired versioning. For each pool creation, Azure Batch will automatically copy a specific or latest version of the application and unzip the content.
6. Upload all dependencies and functional tests to Azure Batch
- Browse to the same Applications section as step 6
- Upload the desired Nvidia driver install. For Azure NV series get the latest here
- Upload all dependency installers required for your streaming application. For example, for our DirectX sample servers, we require the Visual C++ Redistributable for Visual Studio 2015
- Retrieve and upload the latest end-to-end functional test from 3D Streaming toolkit releases. The latest version is 3DStreamingToolkit-FunctionalTests-v2.0
- Upload the latest server deployment script
- You can upload any other scripts or installers that you require for your VM creation
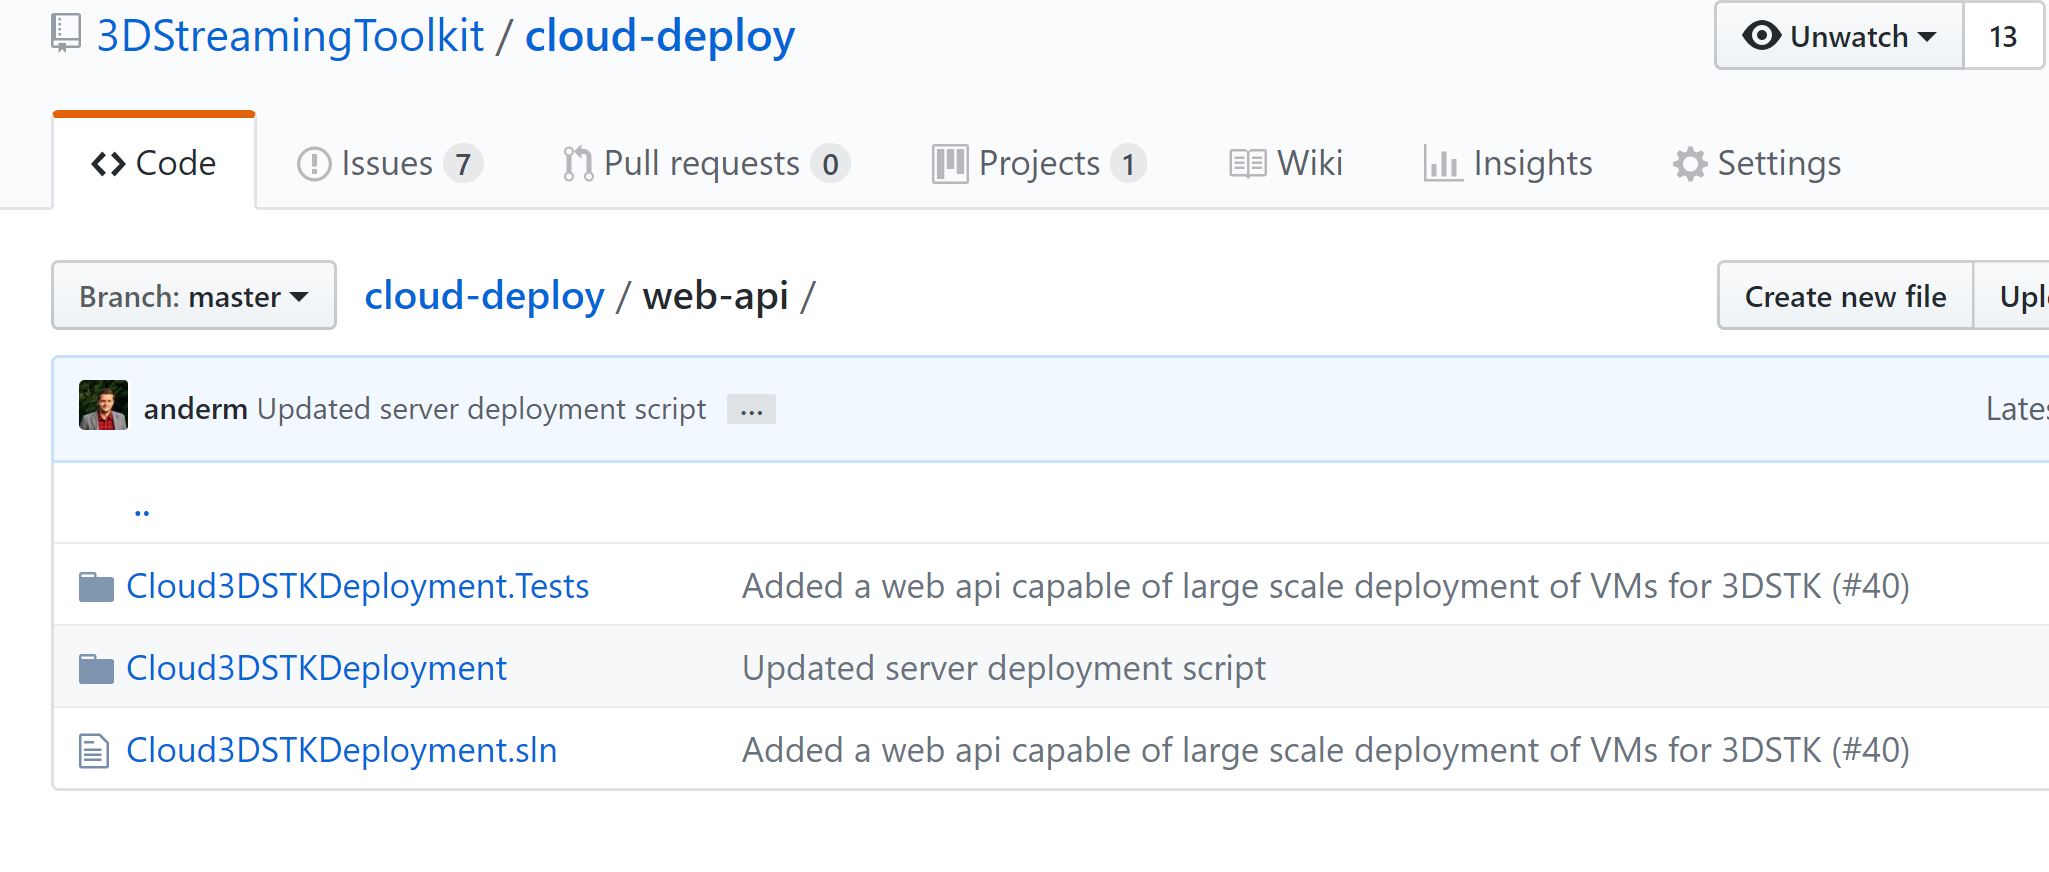
7. Clone/Download the sample Cloud3DSTKDeployment web app/api project
- Refer to the Cloud3DSTKDeployment project from the following repo: https://github.com/3DStreamingToolkit/cloud-deploy
- Clone the repo locally and open
Cloud3DSTKDeployment.slnin Visual Studio 2017.
8. Modify/add QA tasks for Linux/TURN pool creation
- Open to
Services/BatchService.csand look atCreateTurnPoolmethod - Set the desired VM type and Ubuntu version for your TURN server nodes. Be default, we use the
STANDARD_A1machines andUbuntu Server 14.04.5-LTS. See the Azure Batch documentation for more details.pool = this.batchClient.PoolOperations.CreatePool( poolId: poolId, targetDedicatedComputeNodes: dedicatedNodes, virtualMachineSize: "STANDARD_A1", virtualMachineConfiguration: new VirtualMachineConfiguration( new ImageReference( offer: "UbuntuServer", publisher: "Canonical", sku: "14.04.5-LTS"), nodeAgentSkuId: "batch.node.ubuntu 14.04")); - Modify the StartTask if you wish to install a different type of TURN server. In our sample we install a simple docker image running at port 3478 and hardcoded username and password. This is not the recommended approach if you wish to use authentication. See our code story for more options.
pool.StartTask = new StartTask
{
 // Run a command to install docker and get latest TURN server implementation
 CommandLine = "bash -c \"sudo apt-get update && sudo apt-get -y install docker.io && sudo docker run -d -p 3478:3478 -p 3478:3478/udp --restart=always zolochevska/turn-server username password realm\"",
 UserIdentity = new UserIdentity(new AutoUserSpecification(AutoUserScope.Task, ElevationLevel.Admin)),
 WaitForSuccess = true,
 MaxTaskRetryCount = 2
};
9. Modify/add QA tasks for Windows/Rendering pool creation
- Open
Services/BatchService.csand look atCreateRenderingPoolmethod - Set the desired VM size and Windows version. For optimal streaming, we recommended using the
Standard_NV6 VMandWindows Server 2016.pool = this.batchClient.PoolOperations.CreatePool( poolId: poolId, targetDedicatedComputeNodes: dedicatedNodes, virtualMachineSize: "Standard_NV6", // NV-series, 6 CPU, 1 GPU, 56 GB RAM virtualMachineConfiguration: new VirtualMachineConfiguration( new ImageReference( offer: "WindowsServer", publisher: "MicrosoftWindowsServer", sku: "2016-DataCenter", version: "latest"), nodeAgentSkuId: "batch.node.windows amd64")); - Modify the application packages that you wish to include for each pool. Here is an example based on the applications uploaded above:
// Specify the application and version to install on the compute nodes pool.ApplicationPackageReferences = new List<ApplicationPackageReference> { new ApplicationPackageReference { ApplicationId = "NVIDIA", Version = "391.58" }, new ApplicationPackageReference { ApplicationId = "native-server-tests", Version = "1" }, new ApplicationPackageReference { ApplicationId = "sample-server", Version = "1.0" }, new ApplicationPackageReference { ApplicationId = "vc-redist", Version = "2015" }, new ApplicationPackageReference { ApplicationId = "server-deploy-script", Version = "1.0" } }; - Modify the
StartTaskto install all your dependencies and run the unit tests. In this example, we copy the rendering application to a desired path, install vc-redist, nvidia drivers, run the end-to-end functional tests and run the server-deploy-script to set the correct signaling/TURN server information and start the rendering application as a Windows service:
// Command to start the rendering service
var startRenderingCommand = string.Format(
    "cmd /c powershell -command \"start-process powershell -verb runAs -ArgumentList '-ExecutionPolicy Unrestricted -file %AZ_BATCH_APP_PACKAGE_server-deploy-script#1.0%\\server_deploy.ps1 {1} {2} {3} {4} {5} {6} {7} {0} '\"",
    this.serverPath,
    string.Format("turn:{0}:3478", turnServerIp),
    "username",
    "password",
    this.signalingServerUrl,
    this.signalingServerPort,
    5000,
    this.maxUsersPerRenderingNode);
// Create and assign the StartTask that will be executed when compute nodes join the pool.
pool.StartTask = new StartTask
{
    // Install all packages and run Unit tests to ensure the node is ready for streaming
    CommandLine = string.Format(
        "cmd /c robocopy %AZ_BATCH_APP_PACKAGE_sample-server#1.0% {0} /E && " +
        "cmd /c %AZ_BATCH_APP_PACKAGE_vc-redist#2015%\\vc_redist.x64.exe /install /passive /norestart && " +
        "cmd /c %AZ_BATCH_APP_PACKAGE_NVIDIA#391.58%\\setup.exe /s && " +
        "cmd /c %AZ_BATCH_APP_PACKAGE_native-server-tests#1%\\NativeServerTests\\NativeServer.Tests.exe --gtest_also_run_disabled_tests --gtest_filter=\"*Driver*:*Hardware*\" &&" +
        startRenderingCommand,
    this.serverPath),
    UserIdentity = new UserIdentity(new AutoUserSpecification(AutoUserScope.Task, ElevationLevel.Admin)),
    WaitForSuccess = true,
    MaxTaskRetryCount = 2
};
10. Run the Web project, locally or in the cloud.
- Update the JSON configuration file for your environment
- Refer to the sample settings below and replace with your own values
- Run the Web App project locally or after deploying to your Azure account
{
  "BatchAccountName": "BATCH_ACCOUNT_NAME",
  "BatchAccountKey": "BATCH_ACCOUNT_KEY",
  "BatchAccountUrl": "https://BATCH_ACCOUNT_URL",
  "AuthorityUri": "AZURE_AD_URI",
  "BatchResourceUri": "BATCH_RESOURCE_URI",
  "ClientId": "AZURE_AD_CLIENT_ID",
  "RedirectUri": "AZURE_AD_REDIRECT_URI",
  "Vnet": "/subscriptions/{subscription}/resourceGroups/{group}/providers/{provider}/virtualNetworks/{network}/subnets/{subnet}",
  "SignalingServerUrl": "SIGNALING_URI",
  "SignalingServerPort": null,
  "DedicatedTurnNodes": "1",
  "DedicatedRenderingNodes": "1",
  "MaxUsersPerRenderingNode": "3",
  "AutomaticScalingUpThreshold": "0",
  "AutomaticScalingDownThreshold": "0",
  "MinimumRenderingPools": 1,
  "AutomaticDownscaleTimeoutMinutes": 5
}
- BatchAccountName, BatchAccountKey, BatchAccountUrl: These keys are used to access the Batch service created in step 4. (required)
- AuthorityUri, BatchResourceUri, ClientId, RedirectUri: Required keys for TokenCredentials which needs Azure AD. This will give full access to the Batch service with custom images creation. (optional but recommended)
- Vnet: Use the vnet created in step 2 in the following format
/subscriptions/{subscription}/resourceGroups/{group}/providers/{provider}/virtualNetworks/{network}/subnets/{subnet}(optional but recommended) - SignalingServerUrl, SignalingServerPort: The URL and port of the signaling server created in step 3 (required)
- DedicatedTurnNodes: Number of TURN server to create inside Batch. (Minimum 1 required)
- DedicatedRenderingNodes: Number of rendering server per pool. (Minimum 1 required)
- MaxUsersPerRenderingNode: Number of max users per rendering server. (Minimum 1 required)
- AutomaticScalingUpThreshold: A percentage threshold to automatically spin up a new rendering pool if the percentage of active users exceeds it. For example a
50value will automatically create a new pool if the number active users exceeds 50% of the total capacity.0will disable this feature. (optional) - AutomaticScalingDownThreshold: A percentage threshold to automatically remove rendering pools if the percentage of active users drops below it. It is used in conjunction with
MinimumRenderingPoolsandAutomaticDownscaleTimeoutMinutes.0will disable this feature. (optional) - MinimumRenderingPools: The minimum number of rendering pools to keep alive in the Batch service. (optional)
- AutomaticDownscaleTimeoutMinutes: The time to wait in minutes until a scale down is triggered. For example, if the number of active users drops below the scaling down threshold, we start a timer to check for
xminutes if this case stays true. If during this time the number of active users goes over the threshold, the scale down timer is cancelled. If it is still valid after the timeout, we scale down the rendering pools. (optional)
11. Invoke the Cloud3DSTKDeployment api/create endpoint with HTTP POST
- Make a note of the Web API endpoint and append the API route path, e.g.
https://localhost:44329/api/create - Prepare to call the endpoint with a POST request, e.g. using a tool such as Postman
- Use the JSON sample below and replace the values to provide your own input.
- Call the endpoint and observe the response.
{
  "renderingPoolId": "RENDERING_POOL_ID",
  "turnPoolId": "TURN_POOL_ID"
}
12. Setup auto scaling with api/orchestrator endpoint
- Make sure the AutomaticScalingUpThreshold or AutomaticScalingDownThreshold is set in the configuration from step 10.
- Setup your signaling server with the following properties:
- WEBRTC_PUBLISH_STATE: TRUE
- WEBRTC_PUBLISH_URI: the uri published in the step above with the appended orchestrator path, e.g.
https://localhost:44329/api/orchestrator - WEBRTC_TRUST_PROXY: TRUE
- The signaling server will now publish the current state of active users and the orchestrator will decide based on the threshold if pools should be added or deleted.
{
  "renderingPoolId": "RENDERING_POOL_ID",
  "turnPoolId": "TURN_POOL_ID"
}
13. Browse the Batch account using the Portal or Batch Explorer
- Revisit the Azure Portal at: https://portal.azure.com
- Click on the Batch account you created earlier.
- Browse the sections to see Applications, Pools and Jobs within that Batch account
- Check the Pools created with the POST request above
- Monitor the Nodes in each Pool and wait until the status reached the IDLE state
- The Server Rendering applications are now running on the VM and clients are able to connect by joining the signaling server
14. Connect the clients to the VMs
- Look at the Getting Started section to setup a client.
- The WebRTC configuration should use the signaling server deployed in step 3. The TURN server credentials are automatically passed down to the clients (DirectX and WebClient samples) on connection.
- Depending on the servers capacity, dedicated nodes and pools, you can now connect multiple clients and easily scale up/down inside the Azure Batch portal or by triggering the API endpoints from step 11 and 12.
Extra customization
Customizing your Compute Nodes.
When you call the CreatePool() method in the Batch SDK, you have several options how you want to create the Virtual Machines as Compute Nodes within your pool.

- Option A: Cloud Service Configuration: Windows Servers only
- Option B: VM Configuration: Both Windows and Linux Servers, where Batch uses Scale Sets for Linux Servers.
Option A
When using a Cloud Service Configuration, you will have to pick a virtualMachineSize (e.g. standard_d1_v2) and an osFamily (e.g. 5 for Windows Server 2016). You may find the complete list of options here: https://docs.microsoft.com/en-us/azure/cloud-services/cloud-services-sizes-specs
Sample Code:
pool = batchClient.PoolOperations.CreatePool(
    poolId: poolId,
    targetDedicatedComputeNodes: 3, // 3 compute nodes
    virtualMachineSize: "standard_d1_v2",  // single-core, 3.5 GB memory, 50 GB disk
    cloudServiceConfiguration: new CloudServiceConfiguration(osFamily: "5")); // Windows Server 2016
Option B
When using a Virtual Machine Configuration, you will get additional options to use an ImageReference, either from the Azure directory or from a custom image.
- If you use an ImageReference, you will have to provide values for the Publisher, Offer, SKU and NodeAgentSkuId. The quickest way to find out these values is in the Azure portal. Simply browse your Batch account in the Azure portal and click Add Pool to see what options are available to you.
var pool = batchClient.PoolOperations.CreatePool(
    poolId: poolId,
    targetDedicatedComputeNodes: 1,
    virtualMachineSize: "STANDARD_A1",
    virtualMachineConfiguration: new VirtualMachineConfiguration(
        new ImageReference(
            offer: "UbuntuServer",
            publisher: "Canonical",
            sku: "14.04.5-LTS"),
        nodeAgentSkuId: "batch.node.ubuntu 14.04")

- If you choose to use a custom image, you will have to provide a path to the custom VM image. This VM image must be in the same region and subscription as the Azure Batch account. This makes your call to VirtualMachineConfiguration a lot simpler:
virtualMachineConfiguration: new VirtualMachineConfiguration(
    new ImageReference(virtualMachineImageId: VirtualMachineImageId),
    nodeAgentSkuId: "batch.node.windows amd64")

// where VirtualMachineImageId is in the following format
// /subscriptions/xxxx-xxxxxx-xxxxx-xxxxxx/resourceGroups/myResourceGroup/providers/Microsoft.Compute/images/myImage
NOTE: When using a custom image, you may use Azure AD authentication to access the VM image.
Setting up Azure AD for Batch usage.
To set up Azure AD for Batch usage, follow the instructions provided at:
This involves the following steps:
- Register your application with a tenant
- Get the tenant ID for your Active Directory
- Use integrated authentication (not Service Principal)
When registering your Batch App, you will have to add it as either a Web App/API or a Native App.
- If you choose the Web option, you will have to provide API Access Keys.
- If you have a Console app (or other Native app), you should choose the Native option, which does not require any API Access Keys.
When adding integrated authentication, you will have the option to select the Batch API by searching for one of the following:
a. MicrosoftAzureBatch (no spaces)
b. Microsoft Azure Batch (with spaces)
c. ddbf3205-c6bd-46ae-8127-60eb93363864 (the ID for the Batch API)
As of this writing, Option B is the best way to add the Batch API, i.e. searching for Microsoft Azure Batch (with spaces). Registering your Batch application will allow you to use your custom VM image as described above.
After you’ve registered your Batch application, you may browse the Azure Portal under Azure Active Directory, then App Registrations to see a list of registered apps.

Network Configuration for Batch usage.
In the very first step, we set up a Virtual Network. In order to use it programmatically with the Batch SDK, simply set the NetworkConfiguration.SubnetId property to the Subnet Id value of your Virtual Network. You can also customize the Port/IP restrictions for your virtual network.
Sample Code to set NetworkConfiguration for a Batch pool
pool.NetworkConfiguration = GetNetworkConfiguration();
Sample Code to set up a Network Configuration
var networkConfiguration = new NetworkConfiguration
{
    EndpointConfiguration = new PoolEndpointConfiguration(new InboundNatPool[]
       {
        new InboundNatPool(
            name: "UDP_3478",
            protocol: InboundEndpointProtocol.Udp,
            backendPort: 3478,
            frontendPortRangeStart: 3478,
            frontendPortRangeEnd: 3578),
        new InboundNatPool(
            name: "UDP_5349",
            protocol: InboundEndpointProtocol.Udp,
            backendPort: 5349,
            frontendPortRangeStart: 5349,
            frontendPortRangeEnd: 5449),
       }.ToList())
};
There are some guidelines and restrictions when using a creating a Virtual Network for use with Batch. Note that these may be subject to change.
- The specified Virtual Network (VNet) must be in the same Azure region as the Azure Batch account.
- The specified VNet must be in the same subscription as the Azure Batch account.
- The specified VNet must be a Classic VNet. VNets created via Azure Resource Manager are not supported.
- The specified subnet should have enough free IP addresses to accommodate the “targetDedicated” property. If the subnet doesn’t have enough free IP addresses, the pool will partially allocate compute nodes, and a resize error will occur.
- The “MicrosoftAzureBatch” service principal must have the “Classic Virtual Machine Contributor” Role-Based Access Control (RBAC) role for the specified VNet. If the specified RBAC role is not given, the Batch service returns 400 (Bad Request).
- The specified subnet must allow communication from the Azure Batch service to be able to schedule tasks on the compute nodes. This can be verified by checking if the specified VNet has any associated Network Security Groups (NSG). If communication to the compute nodes in the specified subnet is denied by an NSG, then the Batch service will set the state of the compute nodes to unusable.
- This property can be specified only for pools created with cloudServiceConfiguration. If this is specified on pools created with the virtualMachineConfiguration property, the Batch service returns 400 (Bad Request).
Features & Limitations
There are some features and limitations to be aware of when using Azure Batch:
- When using CloudServiceConfiguration, only Windows VMs can be generated.
- When using VirtualMachineConfiguration, both Windows and Linux VMs can be generated.
- The Batch Service use VM Scale Sets to provide Linux compute nodes.
- When using a VM Configuration, an image can be used from the Azure Marketplace or from a custom image.
- Windows VM sizes must be selected from sizes available for Windows on Azure.
- Linux VM sizes must be selected from one of the sizes available for Linux on Azure.
- If using a custom image, the VM image must reside in the same region and subscription as the Azure Batch account.
- For the Web API implementation, SharedKeyCredentials are enough to create a VM in Batch, but a custom image would require TokenCredentials which needs Azure AD for authentication.
Related resources
- Azure Batch website: https://azure.microsoft.com/en-us/services/batch/
- Batch Documentation: https://docs.microsoft.com/en-us/azure/batch/
- Azure Batch in a Virtual Network: https://docs.microsoft.com/en-us/azure/batch/batch-virtual-network
- Batch Samples on GitHub: https://github.com/Azure/azure-batch-samples
- Azure Code Samples: https://azure.microsoft.com/en-us/resources/samples/?service=batch&sort=0